Kitchen Sherers
  • Recipes
  • About
  • Contact
  • Inspriations

Peach No-Bake Cheesecake

8/26/2016

0 Comments

 
Picture
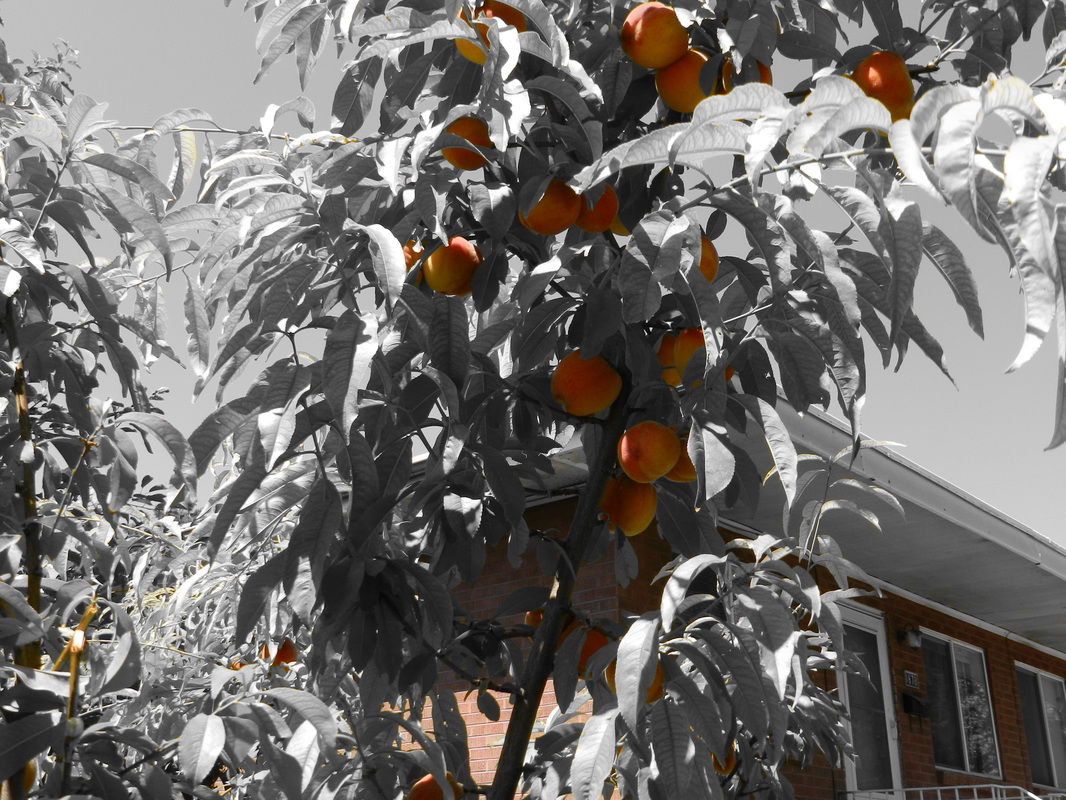
Nothing says summer like fresh peaches. I also love sitting on the front porch, conversing with our good neighbors, and enjoying the warm sun. We were so lucky to have a neighbor that had an abundance of beautiful peaches that she freely gave to us, so we searched for the ripest and tastiest stonefruit. 

Picture
Picture

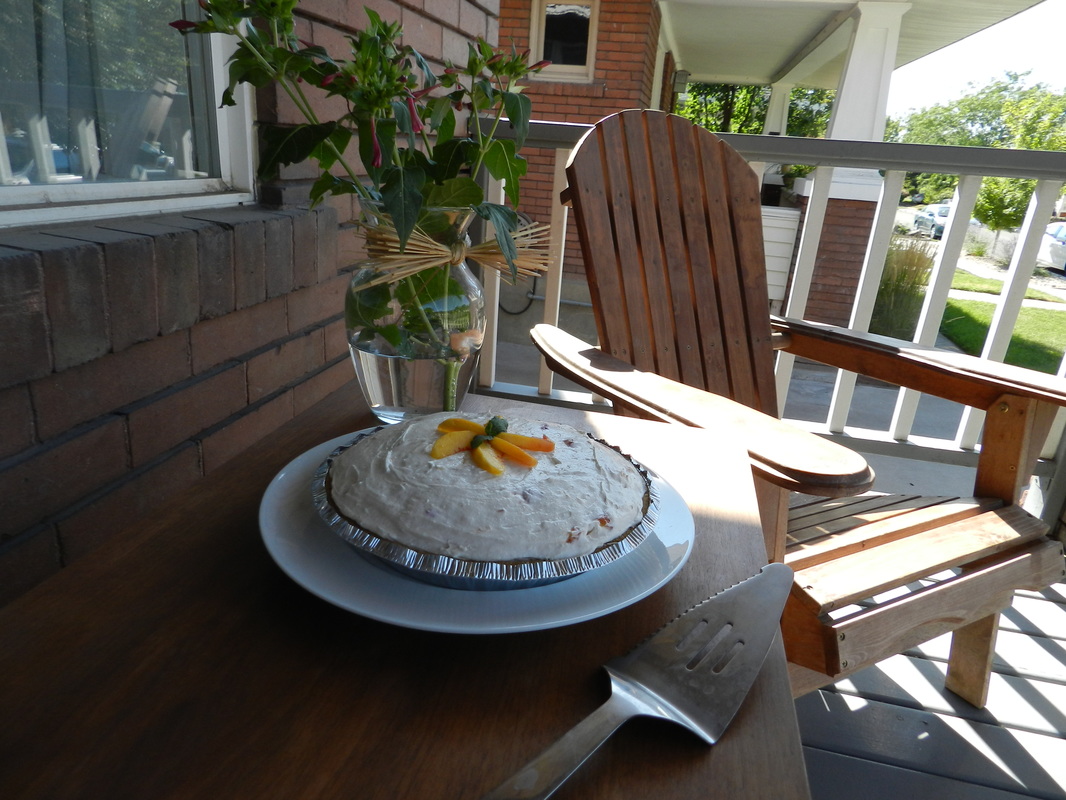
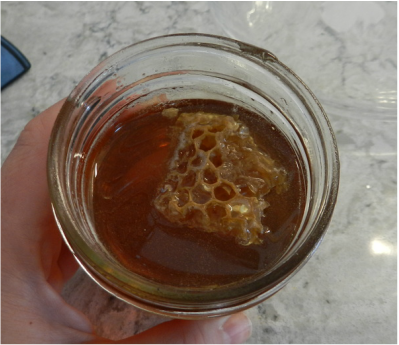
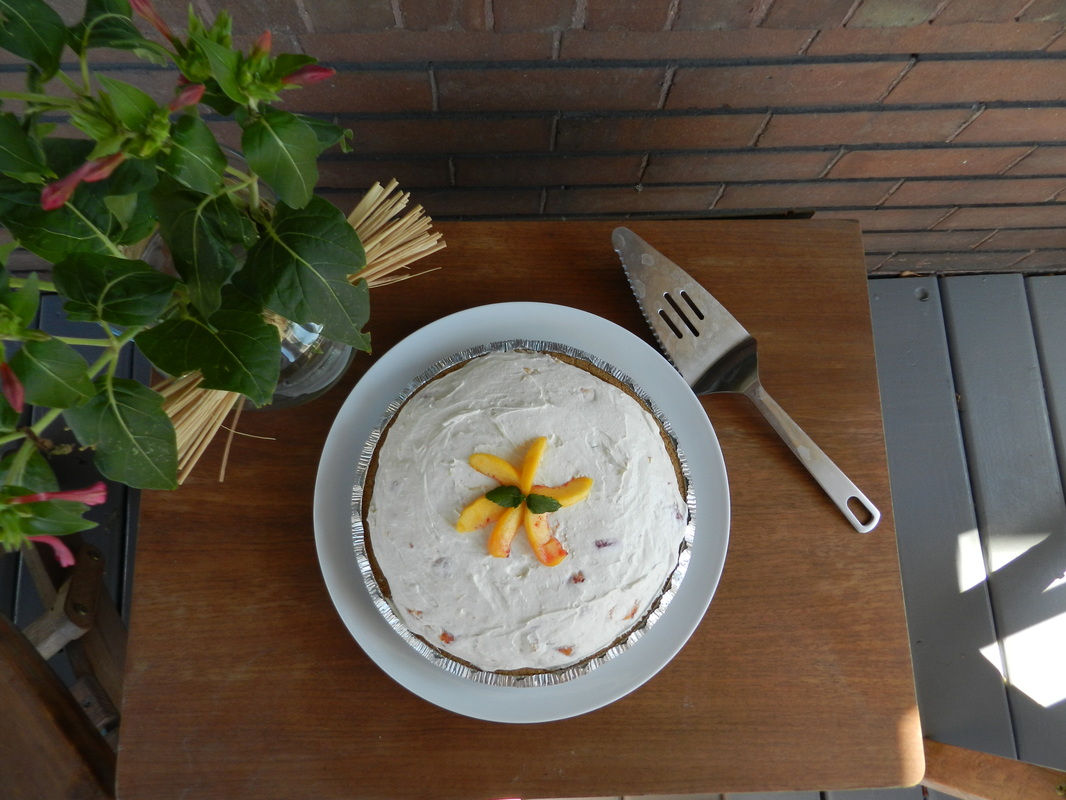
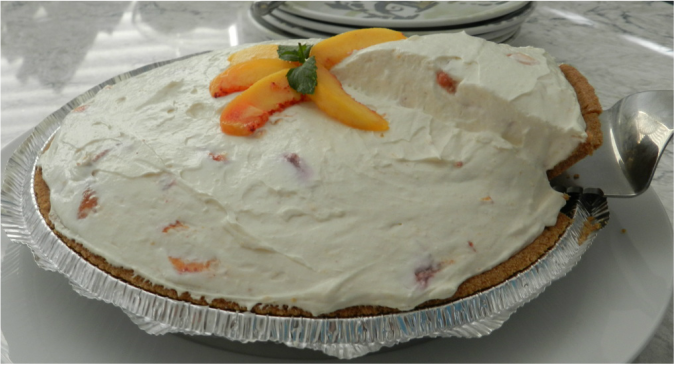
I was craving cheesecake but in this heat, who wants to turn on the oven? The next best solution was to come up with a no-bake cheesecake option with the addition of these lovely peaches. Instead of using granulated sugar, I wanted to use some fresh raw honey that I had just purchased from one of the local beekeepers. This gave a nice subtle flavor that complimented the ricotta. Our little one loves chewing on the honeycomb, so it is was an additional special treat.
Picture
The best part was I found a gluten-free already made graham cracker pie crust. (You could use regular instead of gluten-free). This pie is a great excuse to invite some friends over and have a lovely afternoon. 

Ingredients:

16 oz Cream Cheese
1 C Ricotta Whole Milk Cheese
10 oz Cool Whip (I used TruWhip)
3 T Fresh Honey
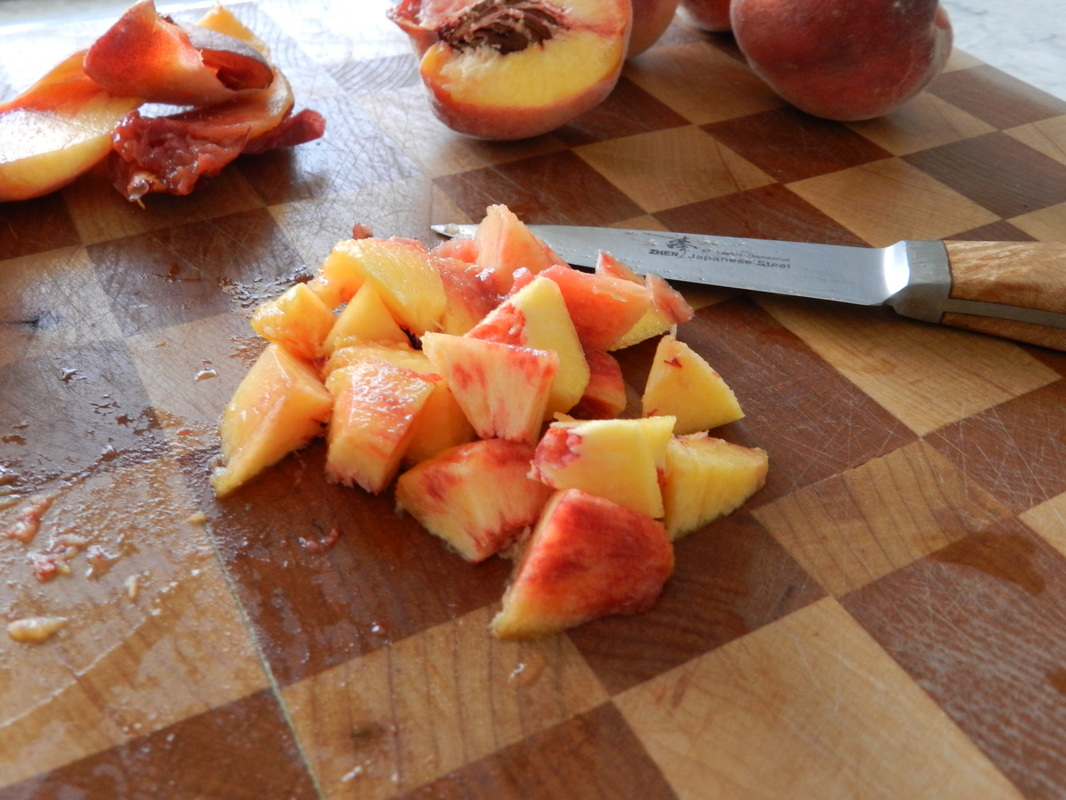
1 C Fresh Diced Peaches 
9in Graham Cracker Crust

In a mixing bowl combing cream cheese, ricotta cheese, and honey and beat until very smooth with a mixer. Fold in the Cool Whip first, and then blend with the mixer until a smooth consistency. Fold in the peaches and place mixture into the pie crust. Place in the refrigerator. 

Chill for at least two hours before serving

​
Picture
Picture
0 Comments

Lemon and Roasted Strawberry Ice Cream

8/25/2016

0 Comments

 
Picture
Photo by Northwildkitchen
First of all, I can't tell you how excited I am to be back writing recipes and creating wonderful memories. I was fortunate enough to go and visit my sister in Norway last month, and I can barely put into words how amazing this time was. Not only was the landscape breathtaking, but the time to spend with my family in such an amazing country was priceless. I also had another fortunate experience, and that was getting to celebrate my daughters third birthday. In celebration of the big day, I whipped up a recipe for ice cream which included the one ingredient at the urging of my daughter--- Strawberry. We were able to go and pick wild strawberries out near my sister's home. However, our bounty was soon devoured by our little ones, so we had to make due with buying strawberries at the store. (This in no way impacted how amazing this ice cream tasted).
Picture
Picture

It was so much fun working with my sister! Especially since she is also an amazing writer and photographer. I encourage you to check out her blog Northwildkitchen. Currently she is a finalist for the 2016 Saveur Awards for best new voice. This recipe was also featured in theNORWEGIANAMERICAN. 

I hope you enjoy it. Normally I am not a huge lemon fan in my ice cream, however, the lemon really made the strawberry taste pop. The buttermilk added an amazing richness! So as summer begins to wind down, grab your ice cream maker and whip up this delightful treat.
​
Ingredients:
Ice Cream
  • 1 1/4 cup (3 dl) heavy cream
  • 1/3 tsp lemon zest  (if you prefer a more lemony flavor, add  3/4 tsp)
  • 1/2 cup (100g) granulated sugar
  • 1/8 tsp salt
  • 4 egg yolks (we used fresh eggs from the hens out back)
  • 1 1/4 cup (3 dl)  buttermilk (if you do not have access to buttermilk, you can add 1/2T and 1 tsp of fresh lemon juice to whole milk)
Roasted Strawberries 
  • 2 cups (400g) fresh strawberries, diced
  • 1/4 cup (50g) granulated sugar
  • 2 Tbs fresh lemon juice
​Preheat the oven to 375°F /190°C. In a glass roasting dish, place strawberries, sugar, and lemon juice and mix until evenly coated. Then place the pan in the oven and roast for roughly 10-12 minutes. After it is done roasting you will want to puree the mixture. (You will have leftovers that can be used as well for a topping on waffles, pancakes, or even this ice cream).
Meanwhile, in a large saucepan add the cream, lemon zest, sugar, and salt and bring to a low simmer so that all the sugar is melted. Reduce to a low temperature and cover the saucepan with a lid. Cook the mixture for roughly 15-20 minutes, stirring occasionally.
Remove the mixture from the heat, and in a small bowl add the egg yolks. Slowly whisk in 1/4 cup of the cream mixture to temper the eggs (the last thing you want is cooked egg yolk ice cream). Once the eggs are brought to temperature, slowly whisk the egg mixture back into the pan, and place back on medium heat. You will want to cook the mixture until it starts to thicken slightly, or coats the spoon. This process should take about 10 minutes. Make sure to stir occasionally.
Once the mixture has slightly thickened, remove from heat and add the buttermilk. After you have mixed in the buttermilk, place a strainer over a bowl and pour the mixture through. This will remove any lumps that may have occurred, or any cooked egg. In the bowl, add 1/2 cup of the strawberry puree. Mix well and then cover bowl.
Chill overnight, and then follow your ice cream machine directions on making the finished product. We added diced fresh strawberries (3/4 cup) right before the ice cream was finished to give it some texture.
Picture
Photo by Northwildkitchen
0 Comments

Enhanced Grilled Cheese

8/23/2016

0 Comments

 
Picture
Okay, we have all been there, midweek challenge. Maybe you had back to back meetings all day, maybe you were engrossed in a major project, or maybe just maybe you forgot to think about planning dinner. I particularly felt like I fell in all three of these categories. The best thing I love about a grilled cheese sandwich is the creative elements you can add to it. I mean we are talking about cheese here. Glorious gift to man (I apologize to those who can not have lactose, and I am deeply sorry). 

Now I am going to discuss a few of the enhanced elements added to tonight's sampling platter. First off,.. two words.. BACON JAM. No, you didn't not mistake what I said. Seriously, when I bought this stuff from Trader Joe's I was a little hesitant. But then tonight, I took the leap, and boy was I not disappointed. This stuff is amazing and paired with a sliced Vermont Cheddar.... one word...... Delicious. 

The second element was using Amour Spreads Tomato Jam. I'm in ​love with this stuff. Not too sweet, with subtle hints of cumin. This jam pairs with eggs and toast, and well just about everything. Tonight, I combined it was a dill Havarti, and the little one was licking her fingers by the end. 

Now my third element was sliced avocado. As I sat there looking at my ingredients, I had an AH HA moment. I am making a BAT grilled cheese. What's that you ask? Well my dear friends, that would be a Bacon, Avocado, and Tomato sandwich. No words to describe this combo, only the guilt of, "did I really just take an extra helping?"  

Now I will give you a little hint of something that I discovered. And I need you to promise me right now that there will be no shaking of heads, or "I'm not trying that". Because as I have mentioned before, the little one will try anything once, so it is a good lesson to live by. I use Mayo (not miracle whip... shaking head) instead of butter. First off, it is so much easier to spread, secondly it always leaves an amazing golden crust on the sandwich. Plus, if we are going to break down mayo into ingredients, you are using an oil (fat) so why not give it a try. I promise you it is like NOS for your grilled cheese (a nice extra boost). 

Anyway, I hope that you can try out your own flavors and combinations. This is great to see what you have and experiment with different tastes. A raspberry jam and gouda cheese would probably be amazing, but alas, that may be for another night.

Enjoy! 
Picture
0 Comments

Eggplant Parmesan Towers

8/21/2016

0 Comments

 
Picture
A few years ago, I had the most amazing opportunity to visit my sister in Italy. One event that I loved was taking an all day cooking course. We made one of my favorite dishes; Eggplant Parmesan. The produce was all bought that morning, and everything was so fresh. I am sure it was a little bit of being in Rome, having a few hours to spend with my husband along sans baby, as well as making amazing cuisine, all contributed to this being one of my favorite memories. 

I wanted to share my love of Eggplant with my little one, and thus far have not been too successful. That is until tonight. She loved this dish! It may have been my spin on a traditional classic, but regardless it was a win. I shouldn't even call it Parmesan since it doesn't contain any, but Eggplant Ricotta doesn't sound as nice. 

There are a few steps that need to occur, so honestly, this isn't one of my weekday go-to's, but the leftovers continue to get even more delicious. 

It is important as you start this process that you do you best to uniformly slice the eggplant so that the thickness is the same. You will also need to salt and rinse the eggplant before you start the frying process. This removes any bitterness from the eggplant, and allows you to enjoy the tender texture once cooked. 

​
Serves 4

Ingredients:
  • 1 Medium Eggplant
  • 1 C Panko Breadcrumbs (GF if needed)
    • 1 tsp salt
    • 1 tsp pepper
    • 1 tsp garlic powder
    • 1 tsp ground oregano
  • 2 Eggs
  • Flour for dredging (I used Cup4Cup GF)
  • 8 oz Shredded Mozzarella Cheese
  • 24 oz Favorite Mariana Sauce
  • 8 oz Ricotta 
    • 1/2 tsp salt
    • 1/2 tsp pepper
    • 1 tsp dried parsley

Pre-heat over to 350 degrees. To begin, place sliced eggplant on a platter and sprinkle with Kosher salt, and allow to sit for roughly 30-45 minutes. The salt will extract all the bitterness from the eggplant. You will then rinse and pat dry. Now you are able to start the frying process. Place enough olive oil in a skillet that will allow you to get a good crisp on the eggplant. You will want to take each slice, dredge in the flour, then the egg mixture, and finally coat in the breadcrumbs. Fry to a nice golden brown and then turn over and fry to the same golden brown on the other side. Continue on until all the eggplant slices have gone through this process. Place on a paper towel to drain any excess oil. 

Take a 9 inch square glass baking dish and place roughly 1/4 cup of the marinara sauce to coat the bottom. Place the first layer of the eggplant (roughly 4 circles on the bottom) Sprinkle half of the mozzarella on the eggplant. Then pour 1/2 of the remaining sauce over them. Place another layer of eggplant in alignment and on top of the ones on the bottom. Then evenly spread the ricotta mixture on the eggplant. Top with the last remaining eggplant, so you should now have four towers of eggplant, three slices deep. Finally top with the remaining sauce and sprinkle remaining mozzarella. Cover with foil (I like to spray the foil so that the cheese doesn't stick) and place in the over for 50 minutes. After which, remove the foil and continue to cook for 10 more minutes. I also like to then broil for a few more just to help brown the cheese on the top. 

Serve with a fresh green salad.

​


​
Picture
0 Comments

    Author

    Busy balancing life's daily obligations, while making sure to  stop and enjoy the simple moments.

    Follow me on instagram
    ​@kitchensherers

    Archives

    September 2016
    August 2016

    Categories

    All
    Condiments
    Dairy
    Dessert
    Fruit
    Gluten Free
    Gluten-free
    Italian
    Main Dish
    Pork
    Salad
    Sandwich
    Side Dish
    Summer
    Vegetables
    Vegetarian

    RSS Feed

Copyright ©2016 KitchenSherers, All Rights Reserved

  • Recipes
  • About
  • Contact
  • Inspriations