Kitchen Sherers
  • Recipes
  • About
  • Contact
  • Inspriations

Elk Chili

9/2/2017

0 Comments

 
Picture
Labor Day weekend. I usually use this time to prepare, reflect, and look forward to the next season. It is a little harder to do that this year, as it is still 95 degrees. We have had an extremely hot and long summer. However, that is not going to prohibit me from the excitement of my favorite season- fall. 

I think I start to perk up, not because I don't care for summer, but rather I love the hominess that fall brings. Gatherings outside, baking, and sharing in the harvest of all of the hard work through the spring and summer. One meal that I love is chili. It is usually easy to pull together, and the best part- really hard to mess up! It allows some creativity, spontaneity (I think I'll try these beans this time, and control (mild to hot). 

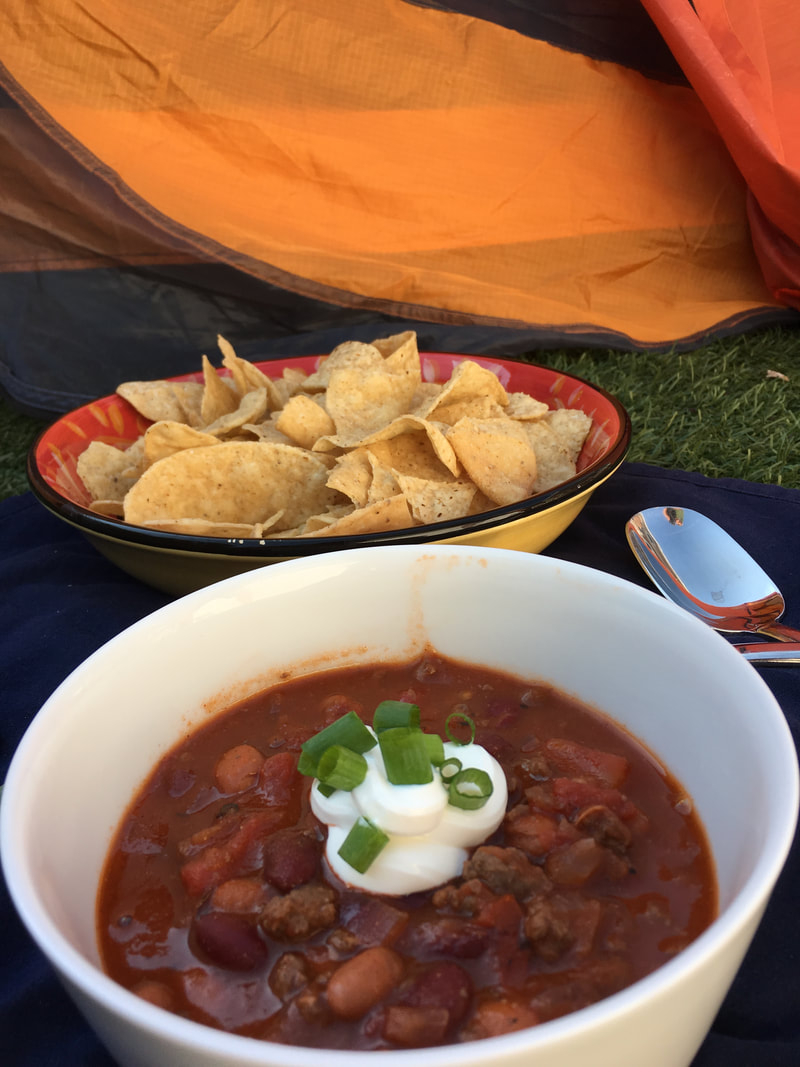
My preference is to use fire roasted tomatoes and chilis. It brings out a nice rustic flavor. Plus if you are in the West, you can usually find some fire roasted hatch chilis which are delish! For this recipe, I used ground Elk. I found it at our Natural Grocers, and I was inspired by one of my favorite brew pubs in town. (I have no aspirations to come close to theirs, but thought I would still try to put something out there).


Ingredients:
  • 1 lb. ground elk
  • 1 medium red onion, diced
  • 1 tsp kosher salt
  • 1 C red wine
  • 1 1/2 C beef broth
  • 1 tsp onion powder
  • 1 tsp garlic powder
  • 1 tsp ground cumin
  • 1 tsp ground oregano
  • 1 tsp chili powder (optional) 
  • 2 14.5 oz cans fire roasted tomatoes (do not drain)
  • 1 14.5 oz can chili beans (do not drain)
  • 1 14.5 oz can red kidney beans (drain)
  • 4 oz fire roasted diced green chilis 
  • 1 6oz can tomato paste

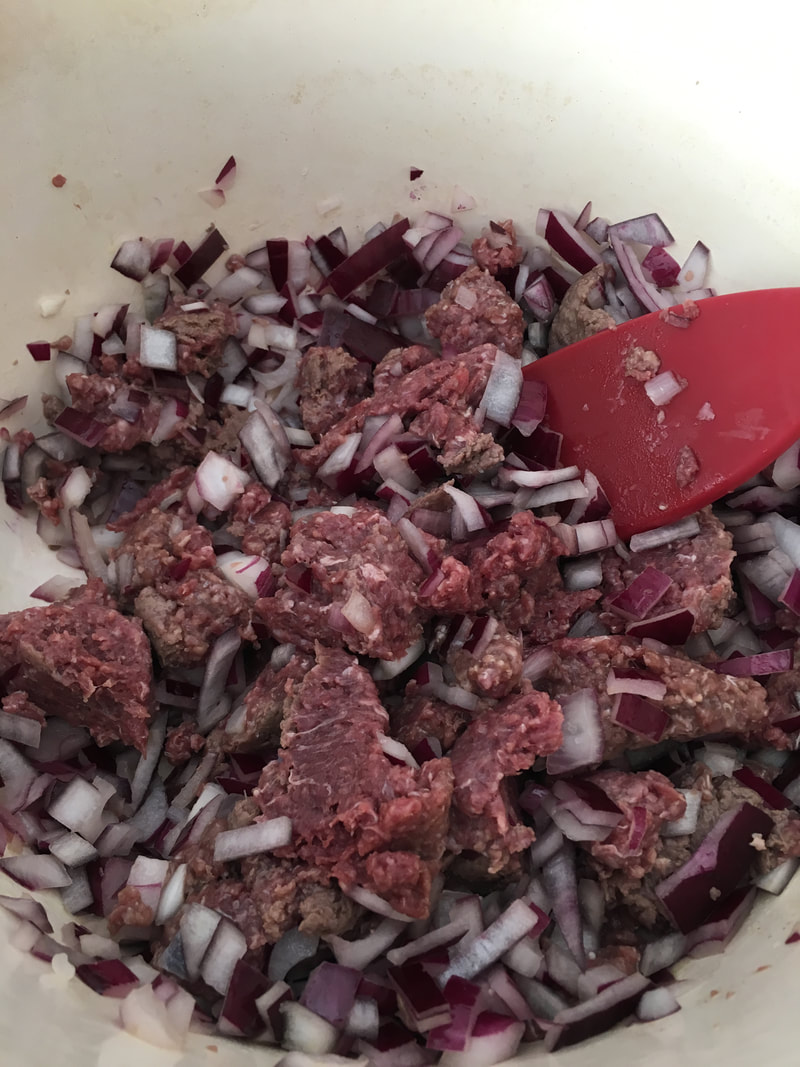
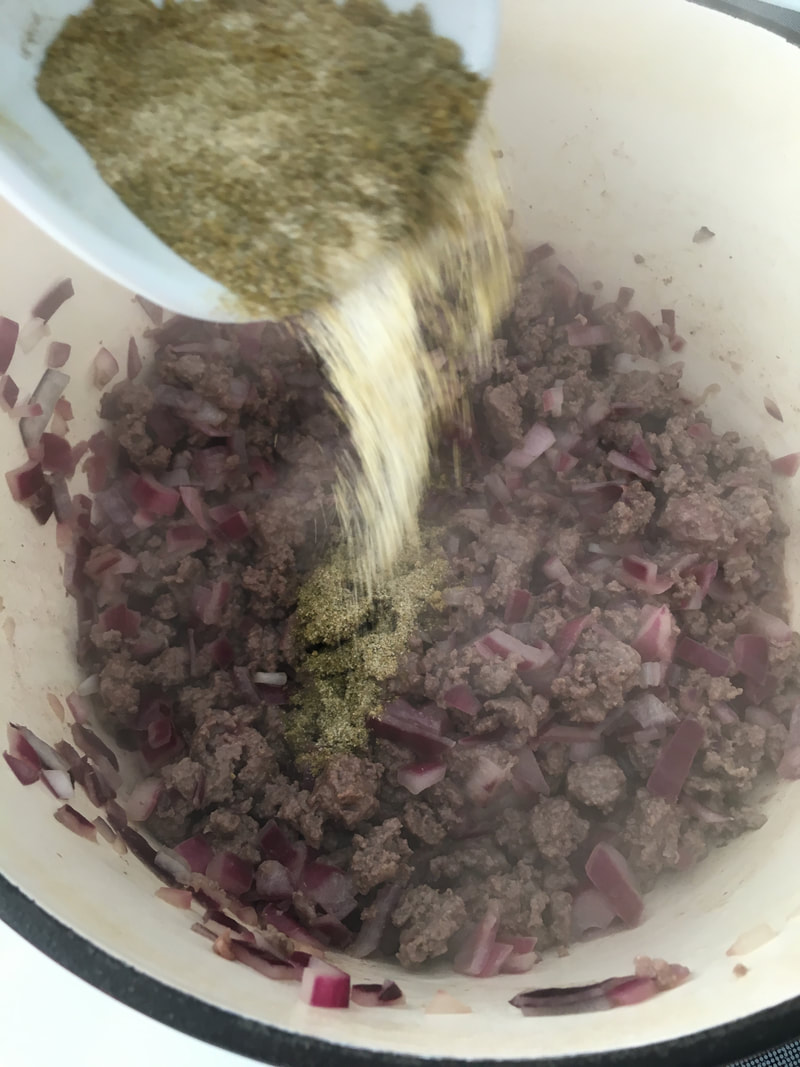
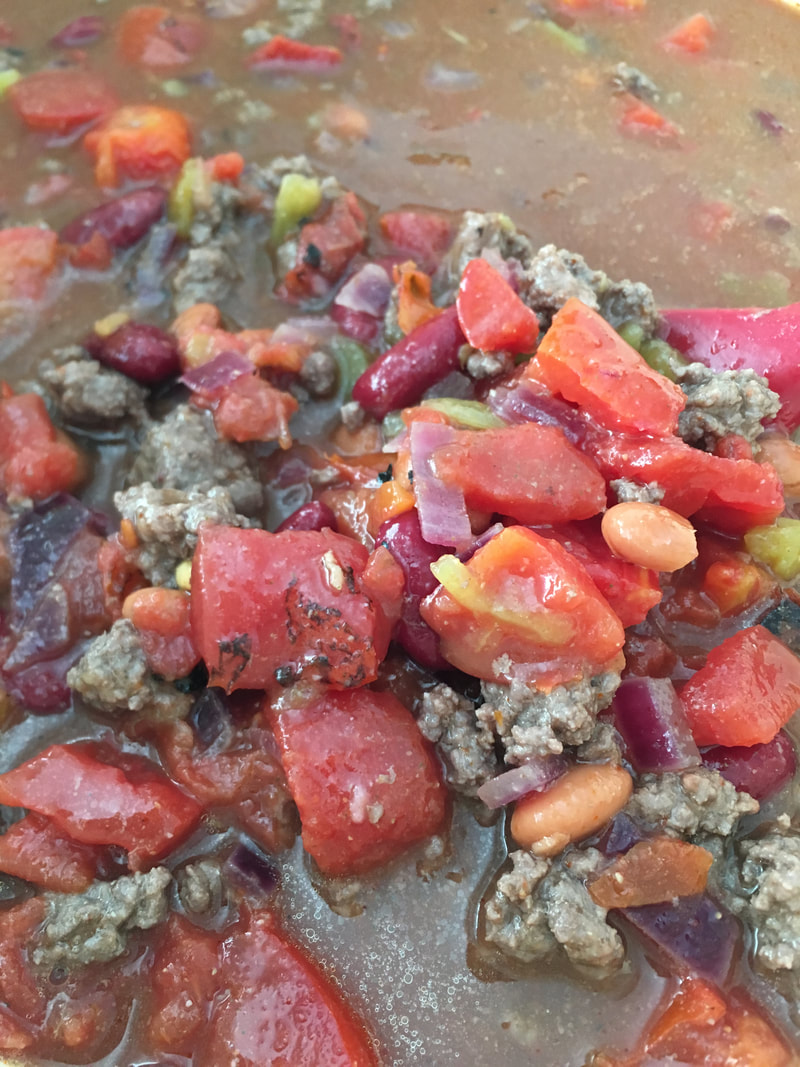
In a dutch over, saute ground elk and onion in 1-2 tsp olive oil. Season with 1 tsp kosher salt, and cook for roughly 10 minutes. Add red wine and boil for 2-3 minutes, then add all ingredients except for the tomato paste. Bring to boil, then reduce heat to a simmer, uncovered. Stir occasionally for an hour an a half. (Chili will start to thicken even more after tomato paste is added). Then add the tomato paste and incorporate by stirring. Continue to cook for an additional 20-30 minutes. Season with salt and pepper to taste.

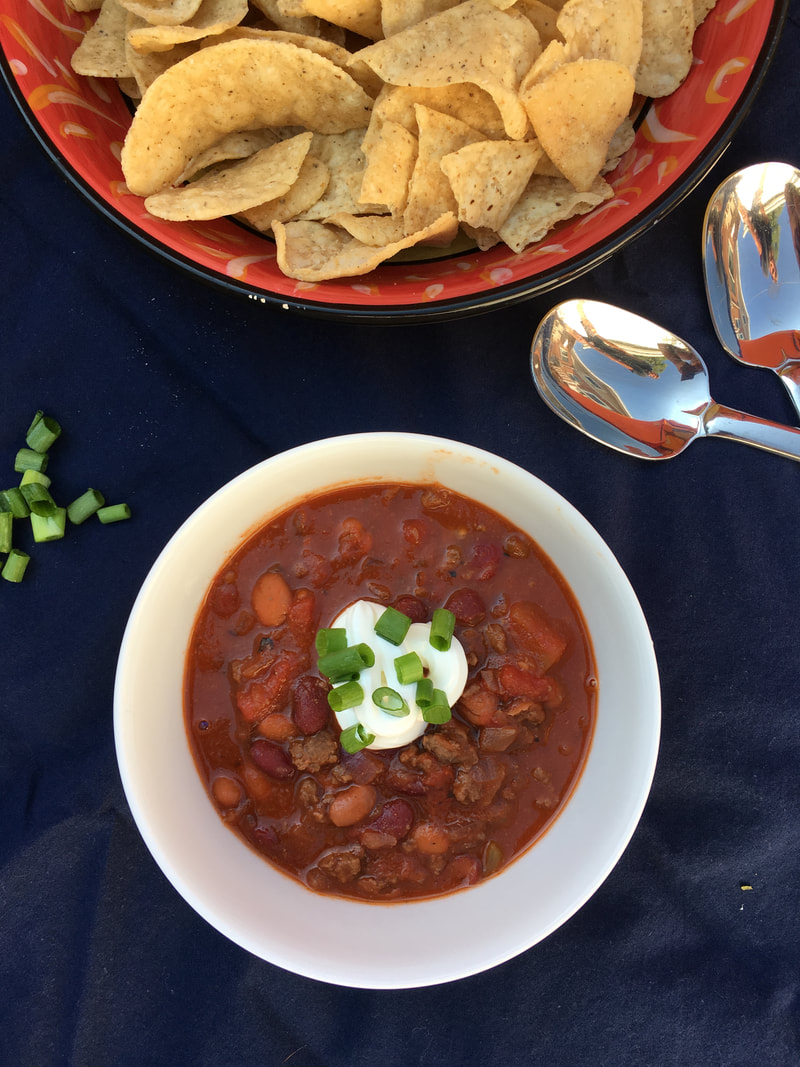
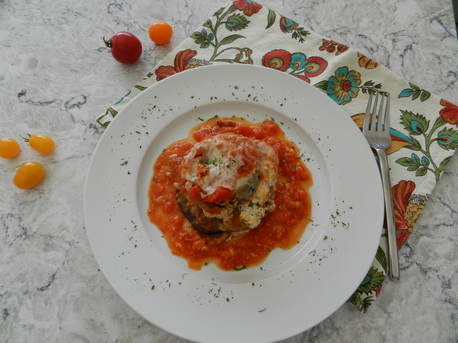
Serve in bowls- garnish with sliced avocado, shredded sharp cheddar, sour cream, green onion, tortilla, etc. 

Also- you could add 1 tsp chili powder, I have a 4 year old who would then refuse to eat it, so I omitted it from the plan.

So enjoy- make a pot- share with some friends on the porch or the campsite- share your favorite summer memories- and usher in the next season! 
​ 


Picture
0 Comments

Vegetable Bolognese

9/5/2016

0 Comments

 
Picture
I think one of the most difficult challenges I have is getting my little one to eat her vegetables. I totally get it, eating yogurt, fruit, anything other than vegetables is much more fun. Also I fully understand that there are parents and caretakers that have done a much better job than I in introducing many types of veggies into the child's diet. While I will not dispute that I should be more persistent, sometimes the little one is just not going to budge. (I'm not quite sure who to blame on that trait; her father or myself)

So today I bring you a wonderful recipe, modified from Giada De Laurentiis- Food Network. It taste great, has a unique blend of flavors, and also is vegetarian. This also pairs well with any starches, so you can mix be creative to what works best for you or your family. As we are headed into fall, a sweet potato or celery root puree would be delectable. 

This is a great recipe to make on the weekend, so that you can have it for those busy work nights. The marscapone cheese gives it a subtle sweetness. Also you can be flexible in how chunky or smooth that you would like this sauce. 

Ingredients


  • .5 oz dried oyster mushrooms
  • 1 1/2 cups hot water
  • 3 ​carrots, peeled and chopped
  • 1 red onion, peeled and chopped
  • 1 red bell pepper, seeded and chopped
  • 2 garlic cloves
  • 1/4 cup olive oil
  • 1/2 tsp dried basil
  • 1/2 tsp ground oregano
  • 2 teaspoons salt
  • 1 teaspoon freshly ground black pepper
  • 8 oz baby portebello mushrooms
  • 2 tablespoons tomato paste
  • 1/2 cup red wine
  • 1/2 cup mascarpone cheese
  • 1 pound pasta (penne or similar would work best)
  • 1/4 cup Parmesan

Place the dried mushrooms in a small bowl and cover with 1 1/2 cups very hot water. Set aside and let the mushrooms soften.

Place the carrots, onion, bell pepper, and garlic in a food processor. Pulse the vegetables until finely chopped but still chunky. Place the olive oil in a large, heavy skillet over medium-high heat. Add the chopped vegetables, dried herbs, salt, and pepper and cook until tender, about 6 minutes. Place mushrooms in food processor and pulse until chopped. Strain the oyster mushrooms, reserving the oyster mushroom liquid. Add the oyster mushrooms, fresh mushrooms, and tomato paste and continue cooking, stirring to dissolve the tomato paste, until the mushrooms are softened, about 5 minutes.

Add the dried mushroom liquid and red wine. Bring the liquid to a boil, reduce the heat to low, and let the mixture simmer until the liquid is reduced by half, about 10 minutes. Add mascarpone cheese and stir just until the cheese is incorporated.

Meanwhile, bring a large pot of salted water to a boil over high heat. Add the pasta and cook until tender but still firm to the bite, stirring occasionally, about 8 to 10 minutes. Drain pasta, and place over the pasta.  
Picture
0 Comments

Enhanced Grilled Cheese

8/23/2016

0 Comments

 
Picture
Okay, we have all been there, midweek challenge. Maybe you had back to back meetings all day, maybe you were engrossed in a major project, or maybe just maybe you forgot to think about planning dinner. I particularly felt like I fell in all three of these categories. The best thing I love about a grilled cheese sandwich is the creative elements you can add to it. I mean we are talking about cheese here. Glorious gift to man (I apologize to those who can not have lactose, and I am deeply sorry). 

Now I am going to discuss a few of the enhanced elements added to tonight's sampling platter. First off,.. two words.. BACON JAM. No, you didn't not mistake what I said. Seriously, when I bought this stuff from Trader Joe's I was a little hesitant. But then tonight, I took the leap, and boy was I not disappointed. This stuff is amazing and paired with a sliced Vermont Cheddar.... one word...... Delicious. 

The second element was using Amour Spreads Tomato Jam. I'm in ​love with this stuff. Not too sweet, with subtle hints of cumin. This jam pairs with eggs and toast, and well just about everything. Tonight, I combined it was a dill Havarti, and the little one was licking her fingers by the end. 

Now my third element was sliced avocado. As I sat there looking at my ingredients, I had an AH HA moment. I am making a BAT grilled cheese. What's that you ask? Well my dear friends, that would be a Bacon, Avocado, and Tomato sandwich. No words to describe this combo, only the guilt of, "did I really just take an extra helping?"  

Now I will give you a little hint of something that I discovered. And I need you to promise me right now that there will be no shaking of heads, or "I'm not trying that". Because as I have mentioned before, the little one will try anything once, so it is a good lesson to live by. I use Mayo (not miracle whip... shaking head) instead of butter. First off, it is so much easier to spread, secondly it always leaves an amazing golden crust on the sandwich. Plus, if we are going to break down mayo into ingredients, you are using an oil (fat) so why not give it a try. I promise you it is like NOS for your grilled cheese (a nice extra boost). 

Anyway, I hope that you can try out your own flavors and combinations. This is great to see what you have and experiment with different tastes. A raspberry jam and gouda cheese would probably be amazing, but alas, that may be for another night.

Enjoy! 
Picture
0 Comments

Eggplant Parmesan Towers

8/21/2016

0 Comments

 
Picture
A few years ago, I had the most amazing opportunity to visit my sister in Italy. One event that I loved was taking an all day cooking course. We made one of my favorite dishes; Eggplant Parmesan. The produce was all bought that morning, and everything was so fresh. I am sure it was a little bit of being in Rome, having a few hours to spend with my husband along sans baby, as well as making amazing cuisine, all contributed to this being one of my favorite memories. 

I wanted to share my love of Eggplant with my little one, and thus far have not been too successful. That is until tonight. She loved this dish! It may have been my spin on a traditional classic, but regardless it was a win. I shouldn't even call it Parmesan since it doesn't contain any, but Eggplant Ricotta doesn't sound as nice. 

There are a few steps that need to occur, so honestly, this isn't one of my weekday go-to's, but the leftovers continue to get even more delicious. 

It is important as you start this process that you do you best to uniformly slice the eggplant so that the thickness is the same. You will also need to salt and rinse the eggplant before you start the frying process. This removes any bitterness from the eggplant, and allows you to enjoy the tender texture once cooked. 

​
Serves 4

Ingredients:
  • 1 Medium Eggplant
  • 1 C Panko Breadcrumbs (GF if needed)
    • 1 tsp salt
    • 1 tsp pepper
    • 1 tsp garlic powder
    • 1 tsp ground oregano
  • 2 Eggs
  • Flour for dredging (I used Cup4Cup GF)
  • 8 oz Shredded Mozzarella Cheese
  • 24 oz Favorite Mariana Sauce
  • 8 oz Ricotta 
    • 1/2 tsp salt
    • 1/2 tsp pepper
    • 1 tsp dried parsley

Pre-heat over to 350 degrees. To begin, place sliced eggplant on a platter and sprinkle with Kosher salt, and allow to sit for roughly 30-45 minutes. The salt will extract all the bitterness from the eggplant. You will then rinse and pat dry. Now you are able to start the frying process. Place enough olive oil in a skillet that will allow you to get a good crisp on the eggplant. You will want to take each slice, dredge in the flour, then the egg mixture, and finally coat in the breadcrumbs. Fry to a nice golden brown and then turn over and fry to the same golden brown on the other side. Continue on until all the eggplant slices have gone through this process. Place on a paper towel to drain any excess oil. 

Take a 9 inch square glass baking dish and place roughly 1/4 cup of the marinara sauce to coat the bottom. Place the first layer of the eggplant (roughly 4 circles on the bottom) Sprinkle half of the mozzarella on the eggplant. Then pour 1/2 of the remaining sauce over them. Place another layer of eggplant in alignment and on top of the ones on the bottom. Then evenly spread the ricotta mixture on the eggplant. Top with the last remaining eggplant, so you should now have four towers of eggplant, three slices deep. Finally top with the remaining sauce and sprinkle remaining mozzarella. Cover with foil (I like to spray the foil so that the cheese doesn't stick) and place in the over for 50 minutes. After which, remove the foil and continue to cook for 10 more minutes. I also like to then broil for a few more just to help brown the cheese on the top. 

Serve with a fresh green salad.

​


​
Picture
0 Comments

    Author

    Busy balancing life's daily obligations, while making sure to  stop and enjoy the simple moments.

    Follow me on instagram
    ​@kitchensherers

    Archives

    September 2016
    August 2016

    Categories

    All
    Condiments
    Dairy
    Dessert
    Fruit
    Gluten Free
    Gluten-free
    Italian
    Main Dish
    Pork
    Salad
    Sandwich
    Side Dish
    Summer
    Vegetables
    Vegetarian

    RSS Feed

Copyright ©2016 KitchenSherers, All Rights Reserved

  • Recipes
  • About
  • Contact
  • Inspriations